Create tileable textures with GIMP
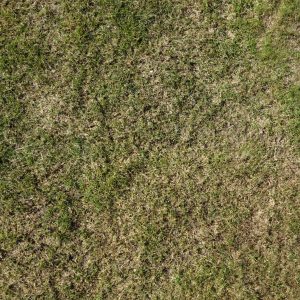
The input material
I took photos of the grass in my backyard to create a grass texture. The camera was held at shoulder height pointing down. I cropped the image into a 1:1 image. Try to keep the image as big as possible. Do not scale it into your desired dimension yet!
Make it tileable!
There are two methods to make the image tileable/seamless.
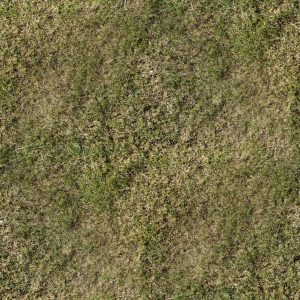
The easiest way to create a tileable texture is to use the "Make Seamless" tool (Filters->Map->Make Seamless).
If you aren't satisfied by the results of the Make Seamless filter you can also do it by hand.
Start by applying an x/2, y/2 offset by using the Layer->Transform->Offset tool.
This will offset the image in such a way that the opposite border match each other perfectly, but it only shifts the problem. You should notice that there are two lines, one horizontal, one vertical, were the image doesn't fit together. You can remove the visible borders in various ways, e.g. using the clone and blur tool.
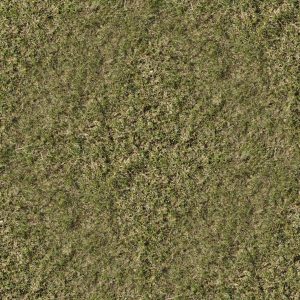
Removing the midrange frequencies
At this point we cloud use the texture, but we will go one step further. The image still contains midrange frequencies, that we want to remove. The midrange frequencies will produce ugly tiling effects if the texture is repeated often.
Start by duplicating the seamless texture and apply a tileable blur (Filters->Blur->Tileable Blur) onto the duplicated version. Choose a high radius, roughly 10% of the images size. This will create a layer containing the mid and low frequencies.
To preserve the low frequencies create a new texture below the two existing. Use the Color Picker with a big radius to select an average color of the texture and fill the new texture with this color.
We now have one layer containing the mid and low frequencies, one containing the low frequencies and one containing all frequencies.
To create a layer containing the high frequencies set the mode of the blurred layer to "Grain extract" and move it above the original layer. By Merging these two layers you gain a new layer containing only the high frequencies. After merging set the mode of the resulting layer to "Grain merge" and merge the two remaining layers. This creates our final image containing the high and low frequencies but no mid frequencies.
Note: I scaled the images to save bandwidth