For my DungeonPlanner project I wanted to use custom icons for the tool buttons. Unfortunately the documentation for this is rather slim. As an additional constraint, the image data should be embedded in the binary as I like to compile and ship a single binary file (as long as this is possible).
The nearest approach I could find was to create buttons with downloaded images. The snippet is for GTK3 so it had to be adjusted for GTK4, but it contained the right function names to know what to search for :).
This is the final code I ended up with:
let button = Button::new();
let bytes = include_bytes!("../../assets/icons/add_chamber.png");
let g_bytes = glib::Bytes::from(&bytes.to_vec());
let stream = MemoryInputStream::from_bytes(&g_bytes);
let pixbuf = Pixbuf::from_stream(&stream, Cancellable::NONE).unwrap();
let texture = Texture::for_pixbuf(&pixbuf);
let image = Image::from_paintable(Some(&texture));
button.set_child(Some(&image));
We start by creating a button. Instead of using the ButtonBuilder as you would normally do, I'm just creating an "empty" button. It should be possible to still use the builder, as we are just replacing the child content at the end.
let button = Button::new();
Next we need to load our image data. As I want my images to be embedded in the binary I use the include_bytes! macro. The raw bytes are then turned into a glib:Bytes struct and finally into a MemoryInputStream. The stream is needed to parse the image data.
let bytes = include_bytes!("../../assets/icons/add_chamber.png");
let g_bytes = glib::Bytes::from(&bytes.to_vec());
let stream = MemoryInputStream::from_bytes(&g_bytes);
The next goal is to create an Image object containing our embedded image. With GTK 4.6 we could still use Image::from_pixbuf but this will be deprecated in GTK 4.12. Instead we have to do an extra step and create a Texture and use Image::from_paintable. The texture can simply be created from a Pixbuf, which is created by using the Pixbuf::from_stream function
let pixbuf = Pixbuf::from_stream(&stream, Cancellable::NONE).unwrap();
let texture = Texture::for_pixbuf(&pixbuf);
let image = Image::from_paintable(Some(&texture));
Finally we can set the child of our button to the image and our icon button is done. The same approach also works for ToggleButton.
To create a menu bar in GTK4 we need a MenuModel, from which the bar is created.
The MenuModel can be derived from a Menu object.
Menu objects can have sub menues and and MenuItems as children, buidling a tree structure which represents the entire menu of the application.
Let's start at the end of our menu definition, by defining the root of the menu tree.
The root should only have sub menues as children.
let menu = Menu::new();
menu.insert_submenu(0, Some("File"), &file_menu);
menu.insert_submenu(1, Some("Edit"), &edit_menu);
let menu_model: MenuModel = menu.into();
This is our root menu and derived model.
The first parameter determines the ordering of the menu entries.
The second parameter defines the name displayed in the menu bar and the last parameter is a reference to another Menu object.
In this example menu has two children "File" and "Edit" which are further menus we have to define.
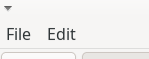
The resulting menu bar will look similar to this:
The menus are Menu objects.
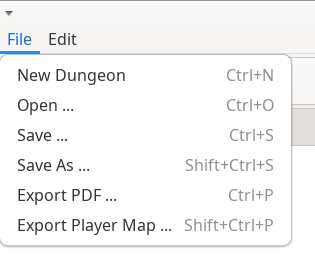
To add selectable entries, MenuItems are inserted.
The first parameter defines the ordering within the menu.
I tend to leave gaps in my ordering to allow insertions later, without changing all order numbers.
The MenuItem takes two (optional) strings as parameters.
The first string is the string shown in the menu. and the latter references an action.
This action is executed if the menu item is selected.
To define the effect of selecting a menu item, actions have to be added to the window.
I insert actions into action groups to organize them by their main menu.
This code defines two actions in the "file" action group; "file.new" and "file.open".
The name of the action group is defined when the group is added to the window.
let file_actions = SimpleActionGroup::new();

let action_file_new = ActionEntry::builder("new")
    .activate(
        move |_group: &SimpleActionGroup, _, _| {
            // Define behavior here
        },
    )
    .build();

let action_file_open = ActionEntry::builder("open")
    .activate(
        move |_group: &SimpleActionGroup, _, _| {
            // Define behavior here
        },
    )
    .build();

file_actions.add_action_entries([
    action_file_new,
    action_file_open,
]);

window.insert_action_group("file", Some(&file_actions));
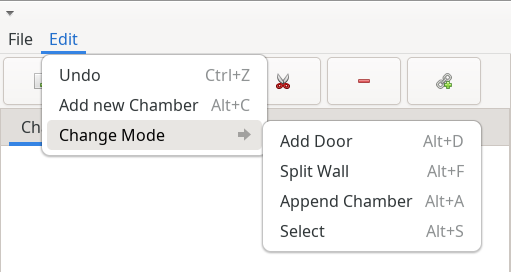
For further organization of menu entries, sub menues can be used.
This uses the same method as used on the root menu.
After defining the menu and deriving the MenuModel a PopoverMenuBar can be created and added to the application window.
This can be achieved by wrapping the content of the window in another box and adding the menu bar to this box.
let menubar = PopoverMenuBar::from_model(Some(&menu_model));

let window_box = gtk::Box::builder()
    .orientation(gtk::Orientation::Vertical)
    .build();
window_box.append(&menubar);
window_box.append(&main_box);

// Create a window
let window = ApplicationWindow::builder()
    .application(app)
    .child(&window_box)
    ...
    .build():